Step 1: Identify Pin Layout
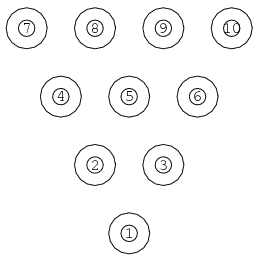
The above diagram shows the pin layout and the number assigned to each pin. As you can see, there are four rows of pin with each consecutive row adding a pin. Therefore, the first row is a single pin. The second row is two pins, and so forth. The closest pin or head pin is assigned the number one. The numbering then continues to the left most pin in the next row and continues with the next number in sequence. The numbering then continues going from left to right in the row until it reaches the end of the row. It then repeats the previous step.
 |
 |